

I recently wrote about how to ferment sauerkraut in bulk. In fact, that post shows how to make ten quarts of kraut at a time. Now, myself excluded, my crew loves kraut! But, even four people, who eat like starving farmhands, can’t conquer ten quarts of kraut before it goes off. So, I water-bath can most of it for later use. That’s what I want to show you today. Canning sauerkraut is easy, quick, and doesn’t require expensive equipment.

Before we begin, let’s pause for a brief PSA: I’m by nature an experimental cook. I never follow recipes. I make up dishes based on what needs to vacate my fridge. Even when baking, I don’t measure, and I substitute ingredients willy-nilly. Like Captain Barbosa, I tend to see kitchen rules as “guidelines”. However, not when it comes to canning!
The rules of canning are all about food safety. Food safety equates to family safety. I don’t take chances with my family. If you’re unfamiliar with canning food, please take a moment to read this post on the basics of canning. It includes links to several great sites that will guide you through canning safely. In this post, we’ll be canning our kraut according to the FDA’s guidelines. PSA over. 😉

I recommend that everyone has a few basic canning supplies. The most useful of these is a canning funnel and a jar lifter. There’s a kit that includes both of these as well as some other tools. I don’t really use the other things. However, the kit is less expensive than a funnel and lifter individually.
For this project, we want everything to be hot.
- The clean dry jars go into a 225º oven for at least 20 minutes.
- The very large pot, in which you plan to process the jars, should be filled about half-way and set to boil.
- The kraut and brine should be transferred to a pot and brought just to a simmer.
- The flat lids need to go in hot (from the tap) water. I set them in a bowl of hot water just before I start to ladle the kraut in the jar.

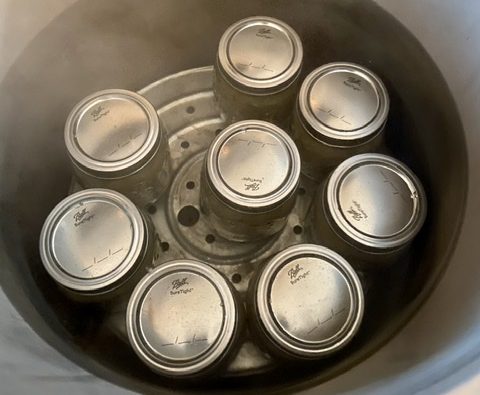
Fill only the number of jars that will fit into the canner at one time. My pressure canner is deep enough that I can place one layer of jars on the bottom rack, top them with a second rack, and put a second layer of jars in. If you only have one rack or if your pot isn’t deep enough to cover two layers of jars with 2-3″ of water, then stick with one layer. You can easily do multiple batches, but to ensure the jars are hot enough to be be placed in boiling water, don’t prefill them.

Use a pair of tongs and the canning funnel to put kraut into each jar. We want the kraut to be packed in fairly tightly. I use the butt end of a spatula to tamp it down. When it is packed in, ladle the kraut’s brine into the jars.

Use a debubbling tool or a butter knife to get rid of any air bubbles along the sides of each jar. This will cause the level of the brine to drop, and they’ll need to be topped up again. We want the kraut to be covered with brine and the brine to stop 1/2 inch below the rim of the jar. A debubbling tool has a measuring gauge on one end. However, you can also use the ring threads as a gauge.

When each jar is packed and topped to the 1/2″ point with brine, wipe around each rim with a little white vinegar on a lint-free cloth. This removes any residue, oil, or debris that might prevent a good seal.

Then, place an unused lid (from the hot water) on each jar. Add a ring to hold the lids tight. Don’t get someone to torque the lids on super tight! We want them ‘fingertip-tight’. That means use only your fingertips and not the strength of your hand or arms. The lids should be snug, but not ‘teenage boy tight’.

Next, using the jar lifter carefully ease each jar onto the rack inside the pot of boiling water. If the water level is too low, top it up with boiling water. (I use my electric kettle.) If it’s too high, bail some out. (I use a small saucepan. It’s easy to end up with too much water due to the displacement of the jars.). The water needs to be 2-3 inches above the top of the jars.

Since the kraut in the jars isn’t boiling, the temperature of the water will drop below the boiling point too. Wait and watch until it reaches a strong rolling boil, then decrease the heat to maintain it, and put a lid on the pot.

Once the water is boiling, you need to set a timer. If you’re processing pint jars, they need to be under boiling water for 15 minutes. Quart jars need 20 minutes. (I process kraut in pints, because, that’s about a meal’s worth for our family.)
As the jars process, keep an ear out to be sure the pot continues to boil, but not so hard that the jars rattle. Set up a clean towel on a table or counter. (I double layer the towel to protect my table from the hot jars.)

When the processing time is complete, turn the heat off, and carefully remove the lid. Be sure to raise the lid away from you so the steam doesn’t catch you. Use the jar lifter to carefully take the jars from the water. Give them a slight tip to get the water off the top. Then, place each one on the clean towel. Leave enough room between the jars to allow air to circulate. Repeat the process as needed until each load of kraut has been water-bathed for the appropriate time.

You should hear the lids start to clunk within an hour or so. This is the happy sound of jars sealing. (When I first started canning, the jars made a lovely pinging sound. But, changes in the lids’ design has resulted in clunks instead.) Don’t touch the jars for at least 12 hours. That includes mashing the lids to see if they sealed 😉. I usually let them sit overnight.
When the 12 hours is up, press the lids to be sure they’re all curved down. If a lid is curved up and it makes a popping (clunking) sound when you press it, the jar isn’t sealed. Unsealed jars should be placed in the fridge and used immediately.
Sealed jars should have their rings removed. (The lids will stay sealed. It’s best to store home-canned food with the rings off. See this post for an explanation.) Rinse the jars to remove any residue.

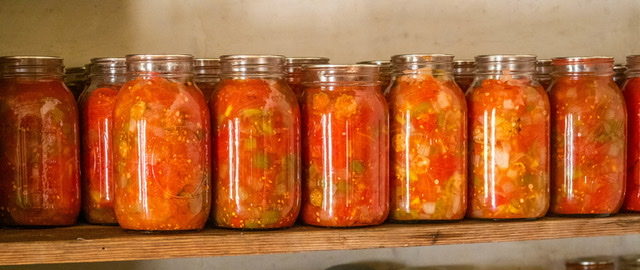
Label the jar lids with a Sharpy. It may seem obvious, that this is kraut made in June of 2020. But without a label, you’ll eventually find yourself wondering what it is and when it’s from. Store the sealed jars in a cool dark place. I wish I had a cellar or basement, but I make do with cupboards. Actually, our canned sauerkraut, like Harry Potter, lives in the cupboard under the stairs.
That’s all there is to it! It requires a lot of explanation, but once you understand the concept it’s quick and easy to do. I canned two batches the other night. It took an hour and a half from set-up to clean-up, and I made dinner while the second batch processed. I hope you’ll give it a try. Water-bath canning is the gateway to food preservation. It’s a wonderful way to get your feet wet and gain confidence.
Do you can at home? Does your family eat like starving farmhands? What is/was your gateway to food preservation? I’d love to hear tales from your kitchen!

This post has been shared at some of our favorite blog hops and linky parties. If you have the time, please check out the great information shared there!


